
On the off chance that you own an embroidery that requirements hanging, or are wanting to get one, I promise you one of these 8 techniques will work for showing your woven artwork/mandala tapestry as stunning divider workmanship. I give you bit by bit directions, so this is certainly a post you’ll need to spare.
- Pole in Casing
On the off chance that your embroidery has a packaging for a pole, at that point this might be the balancing technique for you. There are a great deal of alternatives for bars out there like you’ll discover here and here. Housings can truly disentangle things in that you should simply slip the pole in and balance it on nails. On the off chance that you’d prefer to include a packaging, at that point just sew on substantial weight texture over the back to fit the width of your pole. Sew along the head of your texture strip and the base, leaving the center open for your bar. (A needle worker might have the option to assist you with the sewing part.) The packaging ought to be sewn totally straight and not really agreed with edge of your embroidery, which could be marginally lopsided, causing warped hanging. This might be one of the more typical approaches to show your embroidery or mat, however there are others as well!
2. Classic, nails or push pins
You can nail your embroidered artwork legitimately to the divider with nails, or even push pins if the embroidery is sufficiently light. This is incredible for all the more inexactly woven embroideries, as the nails will fit between the wefts. For all the more firmly woven embroideries or carpets, you would put a little gaps along the edge of your embroidery, however for long haul position and thicker weaves, this may not be an issue.
3.Velcro (appended to a segment of wood)
Holding fast your embroidery to the divider with velcro is an incredible strategy for those needing to abstain from placing any gaps in their woven artwork. For those with a heavier embroidery, I have a supportive indication to ensure your velcro has resilience. Nail a segment of wood just somewhat shorter than the embroidered artwork into divider studs. Follow the harsher velcro side to your segment of wood on the divider and the contrary velcro piece to the head of the BACKSIDE of your woven artwork, and afterward interface your velcro. Presto! You’ve balanced your embroidery without placing a solitary opening in your valued divider workmanship.
4.Mounting on Plywood Board
Another strategy that functions admirably for both heavier and more slender embroidered works of art is mounting your embroidery onto a wood outline (like pressed wood board). In the event that you have an overwhelming or thick embroidered artwork, you can stretch and staple the woven artwork over a compressed wood board or canvas cots and afterward balance it on your divider with sawtooth picture holders. The edges of your embroidered artwork will be turned to the rear of the compressed wood board and stapled down in this technique.
In the event that you are working with a slight or lightweight woven artwork, at that point the best methodology is to extend substantial weight, cloth canvas over the front of your pressed wood board and staple the texture (firmly) to the rear of your wood board around the edge. This wood board would should be more extensive and longer than your embroidery, as it will fill in as the “outline” for your woven artwork divider workmanship. When your overwhelming cloth texture is stapled onto the board, at that point you should hand sew your woven artwork legitimately to the focal point of the texture utilizing a bended needle. The texture appearing along the edge will outskirt your embroidered artwork pleasantly. Make a point to sew your woven artwork around the border, just as at different focuses on the inside of the embroidery so as to keep away from ugly drooping later (because of lopsided weight support). Make certain to utilize string hues that coordinate your embroidered artwork intently and nobody will even notification.
5. Froth Core Mounting
Froth center mounting is a fundamentally the same as procedure to mounting your woven artwork onto cots/pressed wood board. You’ll be making comparable strides as in #4, then again, actually you’ll be stapling your substantial cloth texture to froth board rather than wood. You’ll require two sheets of froth board that you will stick together progress of time, so be certain that you have enough texture to cover the edges of your thick froth load up. Spread your froth board with substantial weight material texture and staple it down (firmly) onto the rear of the froth board around the border. Sew your embroidered artwork to the texture with a bended needle, as clarified in #3.
6.Woven artwork as a roof include
This is an extraordinary thought for those needing to make an increasingly one of a kind climate in a space. An embroidery dangling from your roof can add magnificent show to your space, alongside enriching an infrequently beautified component of your home… the roofs!
7.Confronting and Board Method – For woven artworks with periphery
This technique is ideal for embroideries with periphery on the two finishes. Here’s the manner by which it works. Like with the Velcro technique in #3, you’ll have to cut a piece of wood that is somewhat shorter than your woven artwork. For this strategy, at that point whole woven artwork isn’t connected to a bigger compressed wood board, yet rather a restricted segment of wood is joined that just comes the head of your embroidered artwork.
You’ll have to initially include a “confronting” to the back, head of your embroidered artwork. A confronting is fundamentally a piece of texture around 6 creeps in width and a similar length as your embroidered artwork, which is sewn to the FRONT, head of your embroidery, simply under the periphery. (You won’t see this texture or sewing when it’s set since it will be turned to the back.) This “confronting” is turned to the back and folded over your pre-cut wood board. Staple your looking down onto the wood strip in two columns of staples, along the top and base of your confronting. This will make your top periphery be covered up and on the rear of your embroidered artwork with the goal that the periphery doesn’t dangle descending over your woven artwork. (I’ve incorporated an outline beneath to assist you with conceptualizing this.) You will balance your embroidery to the divider with nails utilizing the back wood strip currently appended to your woven artwork. (For a heavier embroidered artwork you’ll need to drape your embroidery in a spot you can discover a divider stud.) Your periphery over the base of your woven artwork will hang down from the base and look very decent!
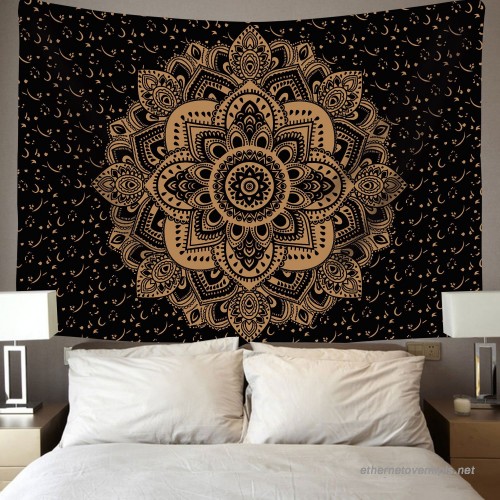
8.Woven artwork as headboard
I truly love this thought, particularly for somebody needing to spare a touch of money by staying away from the more costly, customary headboards. These photos will motivate you to try different things with hanging woven artworks and floor coverings as room stylistic theme.